Sales: (402) 649-0832
Warranty & Tech Support: (334) 621-9373

Why choose 16V over 12V?

16 volt will give you a crisper, brighter image on your graphs. It does this all while giving you better returns from your transducer which results in clearer side, down and forward imaging allowing you to unlock the full potential of your graphs and make you a better offshore fisherman. Maybe you have already noticed your console units with engine running at 14.6 volts look slightly better then your bow units running at 12v this is because of the increase in voltage. 

16 volt is also 20% more efficient than 12 volt, meaning you will get longer run times on the equivalent amp hour rated 12 volt. Example, 16V 80AH will get similar run time to a 12V 100AH. 

Will 16V damage my graphs or void my warranty?

No,  The short explanation for this is, 16V draws 20% less amperage. Amperage is what causes heat in your electronics, which is your electronics number one enemy.. Lets face it you are already running 14.6 on units while engine is running on full charged battery. Plus the units are rated to run above the 16v limits.

Is 16V compatible with my graphs?

Yes, Humminbird's working voltage is 20 volts, Garmin's is 18 volts and Lowrance's working voltage is 17volts. Working voltage on battery is 16.4 so lowrance units cannot be turned on while charging unless you purchased the voltage regulator which maintains the stead voltage of 16.4 to equipment. The run and gun charger can only be run with a voltage regulator installed. This only applies to lowrance units, all other brands can handle the higher voltage when using charger. 

Do I need a specific charger? 

Yes, 16V batteries require a special charger and are not compatible with 12,24 or 36V, or any other chargers. We sell the required 16V LiFePo4 charger on our website. 

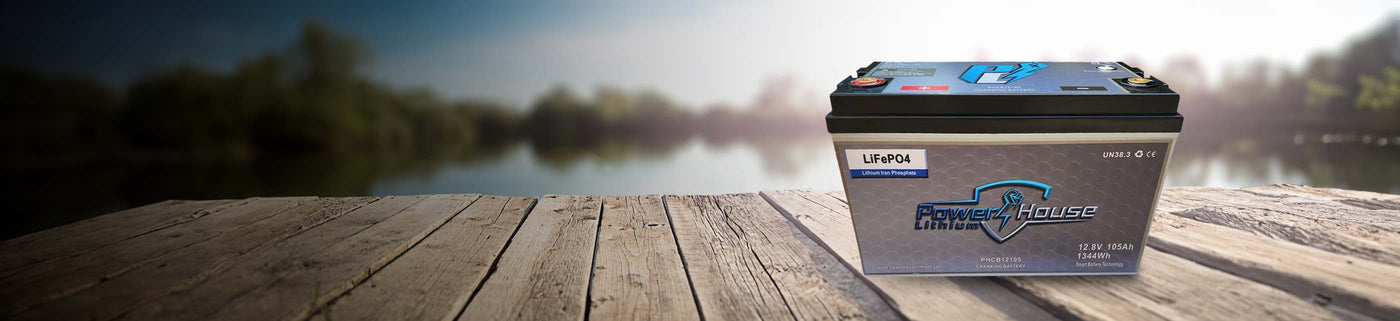
What size of 16V battery do I need?

Refer to the table below under the "16V draw"column in accordance with each of your graphs and transducers. Add these numbers for each graph and multiply that total by how many hours you spend on the water before recharging. This will give you the maximum total amps you will require. Finally, choose the appropriate size that fits your requirements, either 48AH,60AH, 80AH, or 100AH. If your system requires, you are able to wire in parallel to meet your required demand. Best when used with built in waterproof DC charger that will charge the battery when the outboard is running.

What is the importance of the 16v Battery Install Kit?

This install kit gives you the ability to switch from 16V to 12V on the fly. This ensures that you always have a backup plan. If for some reason the power goes out or you're not able to fully charge, or you plain forget to charge your 16V and you run it dead, this give you the ability to switch over to 12V backup power and keep you on the water. The kit includes (4) 6AWG battery cables to hook up the 12v and 16v batteries to a 3 position Perko switch to choose 12v or 16v power. (Note: helpful tip if you are in remote area with hard to get power cord connections and are running the built in DC charger you can select 12v power for the practice day before, and charge the 16v during practice.)

What size wiring is needed to carry loads?

We suggest 10AWG to run form batteries to Perko switch and to units. Our battery install kit comes with (4) 6 AWG battery cables to go to Perko. If you choose to run main power to a separate fuse box then you only need 14AWG as 16v system carries the load much better than 12v and will not drop voltage, especially since you are running each device on a separate circuit to the fuse box. Fuse box eliminates the factory fuse holders that are impossible to get to if a problem occurs on the water. But system will accepted other wiring harness from other suppliers. 

Can I use this battery in place of my cranking battery?

No. This battery is designed to take the load off your cranking battery by running a separate clean power system to the devices.


Jumping Off Battery/Dead Battery Support.

Battery FAQs

If talking to a real-life human is more your thing, you can reach out to us via email, phone or live chat with us during business hours.

Frequently Asked Questions

Why choose 16V over 12V?

16 volt will give you a crisper, brighter image on your graphs. It does this all while giving you better returns from your transducer which results in clearer side, down and forward imaging allowing you to unlock the full potential of your graphs and make you a better offshore fisherman.

Maybe you have already noticed your console units with engine running at 14.6 volts look slightly better then your bow units running at 12v this is because of the increase in voltage. 

16 volt is also 20% more efficient than 12 volt, meaning you will get longer run times on the equivalent amp hour rated 12 volt. Example, 16V 80AH will get similar run time to a 12V 100AH. 

Will 16V damage my graphs or void my warranty?

No,  The short explanation for this is, 16V draws 20% less amperage. Amperage is what causes heat in your electronics, which is your electronics number one enemy.. Lets face it you are already running 14.6 on units while engine is running on full charged battery. Plus the units are rated to run above the 16v limits.

Is 16V compatible with my graphs?

Yes, Hummingbird's working voltage is 20 volts, Garmin's is 18 volts and Lowrance is 17.

Working voltage on battery is 16.4 so Lowrance units cannot be turned on while charging unless you purchased the voltage regulator which maintains the stead voltage of 16.4 to equipment.

The run and gun charger can only be run with a voltage regulator installed. This only applies to lowrance units, all other brands can handle the higher voltage when using charger. 

Do I need a specific charger?

Yes. 16V batteries require a special charger and are not compatible with 12V or 36V, or any other chargers. We sell the required 16V LiFePo4 charger on our website. 

What size 16V battery do I need?

  1. Refer to this table under the "16V draw" column in accordance with each of your graphs and transducers.
  2. Add these numbers for each graph and multiply that total by how many hours you spend on the water before recharging. This will give you the maximum total amps required.
  3. Then choose the appropriate size that fits your requirements (either 48AH, 60AH, 80AH, or 100AH).

If your system requires, you are able to wire in parallel to meet your required demand. Best when used with built in waterproof DC charger that will charge the battery when the outboard is running.

What is the importance of the 16v Battery Install Kit?

Our 16V Battery Install Kit gives you the ability to switch from 16V to 12V on the fly. This ensures that you always have a backup plan.

If for some reason the power goes out or you're not able to fully charge, or you plain forget to charge your 16V and you run it dead, this give you the ability to switch over to 12V backup power and keep you on the water.

The kit includes (4) 6AWG battery cables to hook up the 12v and 16v batteries to a 3-position Perko switch to choose 12v or 16v power.

A helpful tip if you are in a remote area with hard-to-get power cord connections and are running the built in DC charger, you can select 12V power for the practice day before and charge the 16V during practice.

What size wiring is needed to carry loads?

We suggest 10AWG to run from batteries to Perko switch and to units.

Our battery install kit comes with (4) 6 AWG battery cables to go to Perko.

If you choose to run main power to a separate fuse box then you only need 14AWG as 16V system carries the load much better than 12V and will not drop voltage, especially since you are running each device on a separate circuit to the fuse box.

Fuse box eliminates the factory fuse holders that are impossible to get to if a problem occurs on the water. But system will accepted other wiring harness from other suppliers. 

Do I need a specific charger for my 12V battery? 

Technically you don't need a specific charger if your current charger has the capability of lithium charging. However, we have different options for charging that allow you to retrofit your current onboard charging system to charge your dedicated electronics battery, for example the run and gun charging system.

Please feel free to reach out to support if you have specific questions.

Troubleshooting

My battery will not take a charge and is showing 0% SOC (state of charge) on the app.

Dead Battery Support

Steps to take and check for batteries that have quit discharging.

(REMOVE LOAD FROM BATTERY FIRST)

1. Delete app off phone and then reload to make sure you have the latest version.

2. Connect to app go to More (bottom right box) then click on cell page.

3. Check cell page to find any warranty issues. (cells that may be an issue will be in red). If you have red cell please call tech support but only check for red after getting new app).

4. If any cells are below 2850mv and no red cells then battery is just out of energy and needs recharging.  (follow below instructions)

If you completely run your battery down to 0%, then the bms has to be reset. This issue is easily corrected. (note if you are running a Run & Gun charger then there is nothing extra to be done as these chargers are designed to wake up the BMS automatically when the charge cycle starts.) (Also new 2 bank and 3 bank chargers from us with mode and activate buttons will wake up BMS just push mode or the activate button for 5 seconds and release this will force charger to start charging.) if this does not work then follow below steps.)

5. Hook up your charger and notice the lights on the charger. (All digital chargers now days have to have current on terminals before chargers will start.) If you are using the blue portable non-waterproof charger, then you will have one red light and one green light. One red light means you have a/c power to charger and one green light means you do not have enough voltage to start charger, or battery is fully charged, or you have bad connection. (if both lights turn red then you are charging just use app to confirm battery status has changed to charging. If your battery is still not charging then following the below steps.

6. While charger is still on and connected to the battery you need to hook up jumper cables to 12v battery and look at the charger, it should now show charging status. Check app to confirm and go to cell page and make sure all cells are above 2850mv then disconnect cables. The charger should now continue to charge. If charger does not charge by itself then call tech support only after the above instructions have been done. (Make sure if you are using your cranking battery you take off all the leads off the positive post first before jumping batteries as when the BMS is reset it will supply the rated voltage and if you have not removed the positive wires off the source battery you will cause damage to the item attached to the 12v battery. The 12v battery will not be affected by the higher voltage as long as you pull cables off after cells reach 2850mv in battery that was dead. this generally only takes a few minutes to reach above 2850mv.)  

7. Using a jump pack to supply direct current instead of another 12v battery.  Sometimes a jump pack can be used to supply direct current to the dead battery in order to trick the charger into turning on. Some jump packs will not supply voltage as well if there is no or very low voltage on terminals you need to test your jump packs with a meter to see if they provide voltage to clamps when not hook to anything. If yours does put out voltage to clamps then follow step 5 and make sure charger comes on and check app for status change and cell voltage going over 2850mv.

USING A HIGHER VOLTAGE BATTERY TO CHARGE A LOWER VOLTAGE BATTERY. CALL TECH LINE FOR THIS METHOD


My charger is showing a green and red light.

Check the PowerHouse Lithium app. This is normal is the battery is shown as 100% charged.

If the app does NOT show 100% charged, this is indicative of an incomplete circuit.

  1. Watch the lights as you grab each side of the Anderson connector with one hand. 
  2. Wiggle the Anderson connector back and forth as you continue to watch the lights.
  3. Between your thumb and your index finger, wiggle the cord that is attached directly to the charger module.
  4. Check your circle eyelet connection at the battery to make sure they are secure. 

If one of these lights goes out while wiggling, you have a loose connection.